
Swimming Pool Tile Installation: Common Challenges and Solutions

Swimming pool tiles play an important role in the final appearance of a pool. They bring colour, texture, and character to the design. However, swimming pool tile installation involves much more than placing tiles on a surface.
From preparing the pool surface and applying tile adhesive to keeping the tile lines straight and cutting around curved steps, every stage requires care and attention to detail.
At Isaan Pool, we have worked with different pool designs and tile sizes across Northeast Thailand. Each project brings its own challenges, and working with new materials gives our team opportunities to learn and improve.
Swimming Pool Tile Installation: Preparing the Surface
Before installing tiles, the pool surface needs to be properly prepared.
The concrete or other substrate must be suitable for the chosen tile installation system. It may need cleaning, levelling, or other preparation before tile adhesive can be applied.
If the surface is uneven, it can make it harder to keep the tiles aligned. Poor preparation can also affect how well the tile installation performs over time.
This is why tile installation is not just about placing tiles on a wall or floor. The work that happens before the first tile is installed is just as important.
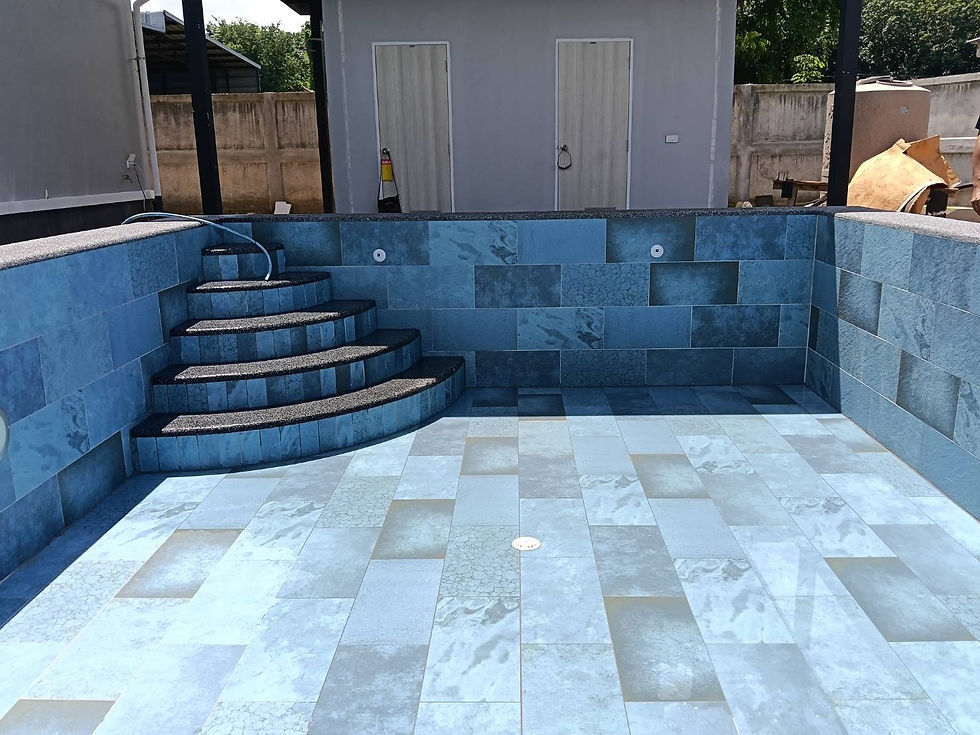
Preparing each tile carefully before placing it on the pool surface. Keeping the tile lines even takes patience and careful adjustment. Larger tiles create a different look across the pool walls and floor. Curved steps require extra care when measuring and cutting tiles. Tile installation also needs to work neatly around pool fittings. A wider look at the pool as the new tile design comes together.
Keeping the Tiles Straight and Even
One of the biggest challenges when tiling a swimming pool is maintaining consistent alignment.
Tiles need to follow the planned lines, with even spacing and a consistent appearance across the walls and floor. Small differences can become more noticeable as the installation progresses, especially across large areas.
Our team needs to check the alignment regularly and make adjustments as we work.
Tile levelling clips and spacers can help maintain consistent spacing and reduce differences in height between neighbouring tiles. However, they do not replace careful installation or proper surface preparation.
Taking time to check each section helps create a cleaner and more consistent finish.
Swimming Pool Tile Installation with Large-Format Tiles
For one of our recent projects, we used 30 × 60 cm pool tiles for the first time. These tiles were larger than the ones our team normally worked with, so we had to adjust our usual approach.
Larger tiles can create a modern look with fewer grout lines, but they also require careful handling and positioning.
Applying adhesive evenly, placing each tile accurately, and keeping the alignment consistent can take extra time. The condition of the surface and the requirements of the adhesive system also become especially important.
For our team, the installation moved more slowly than our usual tile work. It was a new experience, but we were happy to see how the different tile sizes and shades came together.
Every project gives us a chance to learn and improve our process for the next one.
Cutting Tiles Around Steps, Corners, and Pool Fittings
Flat walls and floors are only part of a swimming pool.
Steps, curved sections, corners, drains, and underwater lights all require additional attention during tile installation.
Tiles need to be measured and cut to fit these areas while keeping the overall pattern as consistent as possible. Curved steps can be particularly challenging because the tiles must follow the shape of the structure.
The location of pool fittings also needs to be considered carefully. Poorly planned cuts can affect the appearance of the finished work and may create unnecessary difficulties during installation.
These details can take longer than tiling a large, straight section, but they make a difference to the overall result.
Choosing the Right Tile Adhesive and Installation Method
Not every tile or installation condition is the same.
The adhesive and installation method need to be suitable for the tile material, tile size, substrate, and swimming pool environment. Products intended for ordinary indoor walls may not be appropriate for a submerged pool application.
Correct adhesive coverage is also important. Voids behind tiles can create weak spots and may affect the durability of the installation.
The team must follow the product manufacturer's instructions for surface preparation, mixing, application, working time, and curing.
Choosing suitable materials and following the correct installation method helps reduce the risk of problems later.
Working Around Weather and Site Conditions
Swimming pool construction takes place outdoors, so weather and site conditions can affect tile installation.
Rain can introduce water and dirt into the work area, while excessive heat or direct sunlight may affect the working time of some tile adhesives.
The team also needs a suitable working environment to keep materials clean and complete the installation properly.
When conditions are not suitable, it may be necessary to adjust the work schedule rather than rush the installation.
Good planning helps the team make progress while protecting the quality of the work.
Taking Time to Get the Details Right
Tile installation can look straightforward when you see the finished pool, but the process involves many small decisions.
The team needs to check tile alignment, spacing, cutting, adhesive coverage, and transitions between different sections of the pool.
With a new tile size or an unusual design, these checks may take even more time.
From our experience, trying to finish too quickly can make it harder to maintain consistent workmanship. Taking the time to check the details as we go helps us identify adjustments before moving too far ahead.
The goal is not simply to cover the pool with tiles. It is to create a finish that suits the design and follows the requirements of the installation system.
What We Learn from Swimming Pool Tile Installation Projects
Tiling a swimming pool requires patience, preparation, and attention to detail. From preparing the surface and keeping tiles aligned to cutting around curved steps and working with larger formats, every stage brings its own challenges.
Our first project using 30 × 60 cm pool tiles was a good example. The installation took longer than our usual tile work, but it gave our team valuable experience with a different tile size and a new installation process.
We are always learning from the work we do, and each project helps us understand how to approach the next one more effectively.
Because a good swimming pool is not just about choosing beautiful tiles. It is also about taking care with the work behind them.
We build it – You enjoy it – Quality always wins.


Comments